Al underbridge we faced some lessons from the issue of color digitally with Photoshop. The lessons did this little tutorial, written by Julia, one of the talented blog administrator. The technique we have suggested that refers to the solid color of drawings made with Adobe Photoshop to stretch or retouched in china and without nuance. Of course not the only existing color technique, but it is one that we recommend as good starting point. (CLP)
Well begun is half done : Before you become familiar with the scanner, you must make sure your design is clean and well defined. Good idea to use the blue pencil for design, since it does not leave traces in the scan. If you prefer the classic pencil, we must ensure that the cancellation is accurate. A precise and simple china (without too many dashes) will be easier to paint.
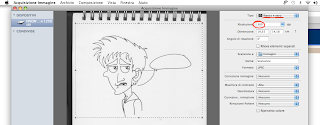
1) First set the scan mode Grayscale and resolution 300 dpi
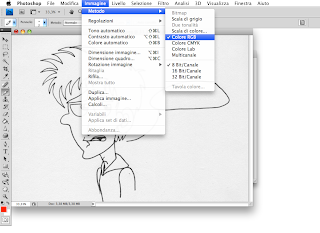
2) Now open the file in Photoshop and check that the m ethod image is Grayscale and RGB or Bitmap.
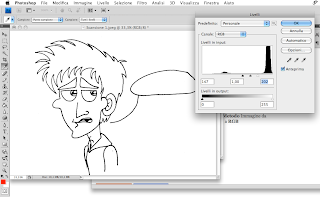
2) At this point, pressing Ctrl + L ( Option + L ) you open the layer palette. The aim is to improve the contrast of the scanned image in order to lighten the background image to black and darken the sign until it is completely black. Experiment with the sliders under the graph, changing the image of black and white until the mixture you want. It may be useful to display the image with a zoom 100% in order to monitor the effect on a per pixel. Save the settings.
3) At this point, make sure you have a perfect contrast, you have to convert the m ethod image in Bitmap (choose the conversion option 'threshold', without touching the parameters). Then, r iConvert the image Grayscale and finally RGB (which is the mode that allows you to color). And do not forget to save the image!
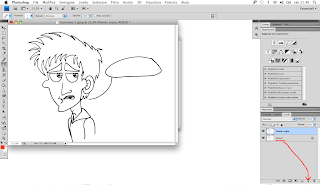
4) It 's time to focus on the layer palette (View> Layers). The first thing to do is drag the background on the "new level" to duplicate it. This copy is set in the background mode Multiply and kept if mpre top the layer palette. We will need to "overlap" with the stroke color image, while the background layer will serve as a backup copy
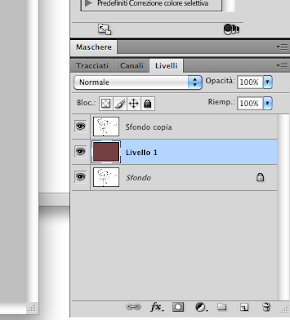
5 ) Now, we must create a new layer (with the icon bottom right next to the trash in the layer palette) and fill it with color. It will be the basis of our design.
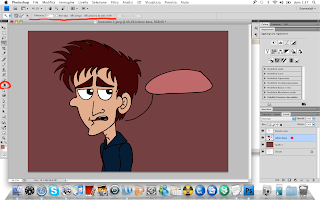
6) An additional layer will serve to create flat areas of color, selecting the instrument Magic Wand parts of the image to be colored. Beware of the ettings Magic Wand tool : tolerance 30, contiguous, NO anti aliasing , samples all levels. Once you select the area to fill it with color, you can use the bucket, but it is better
use the gradient tool (in addition to the bucket fill tool) on a gradient from fully transparent

7) To enter the shadows, after being flat colors, create a new layer in Multiply mode and draw the shades using a choice of color (gray, purple, blue) If you
Optionally, the boundaries blur between light and shadow in the area using special tool.
The end result will be the result of your choices only technical and artistic and not come back as anything written here, well ... know that Photoshop is always right. So
resign;)
And try to follow closely the words of the Master Pancini.
Good Job!
0 comments:
Post a Comment